-40%
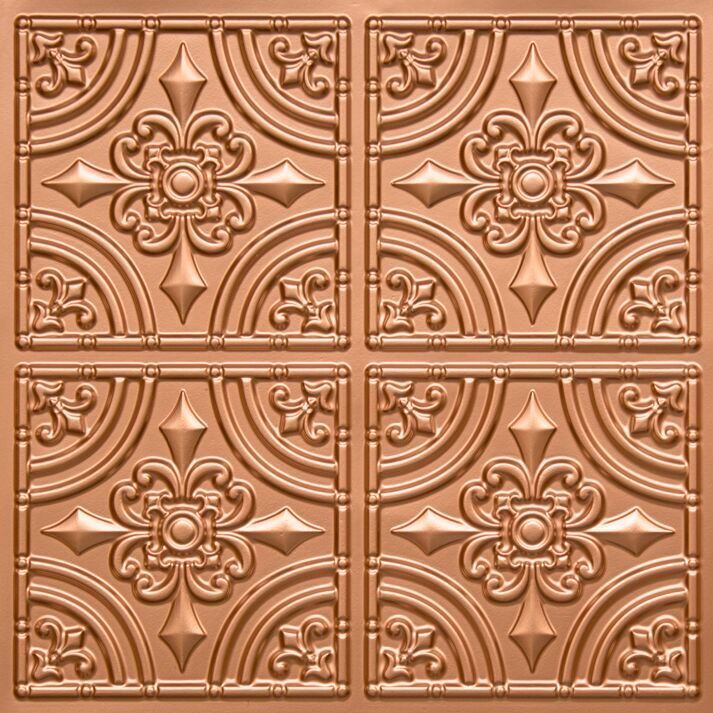
# 205 (Lot of 5) PVC Faux Tin Decorative Ceiling Tile Panels Glue-Up / Grid
$ 26.39
- Description
- Size Guide
Description
Quick FactsApproximate
Size:
2 ft. x 2 ft.
Coverage:
20
sq. ft. per case, sold in a case of 5 panels, each panel covers 4 sq. ft.
Thickness:
Lightweight
.02 in. (.50mm)
Material:
PVC
Paintable?
Yes
Moisture Resistant?
Yes
Installation Methods:
Glue Up Only (this style is NOT for grid installation)
Fire Rating:
Class "A" -
essential for commercial or residential installations that require a fire rating for ceiling tiles to meet local fire codes.
How many tiles do you need?
Measure the area you want to cover and divide that by 4. We recommend that you add 10% for waste/replacement tiles.
For our international
(Non-U.S.)
customers:
Please note that our shipping prices are for shipping charges only. There may be additional charges such as customs or duties that the customer is responsible for.
Do you need the tile accessories below? Visit our Ebay store!
Border Tiles
The border tile is an attractive, slightly textured tile that is perfectly suited for use as a border tile for your direct mount tiles.
The pattern-free design allows it to lay flat, even when cut to size, which eliminates the worry of gaps.
Grid & Seam Covers
Decorative strips are designed to cover the joints between ceiling tiles in direct mount (glue or staple-up) installations.
Made from robust, 0.02 in. thick vinyl plastic, decorative strips are flexible and
lightweight for easy installation. These strips will make your tile joints disappear, leaving nothing to detract from your new, custom ceiling.
Glue Up (Direct Mount) Ceiling Tile Installation Instructions:
Follow these simple steps to install our overlapping edge decorative ceiling system:
1.
Wipe off the ceiling/surface to make it smooth and even. Remove loose plaster, paint, wall paper etc.
2.
Before you begin, lay a few tiles out on the floor to check the size and overlap. It is recommended to start installing from the center of the ceiling.
3.
Draw straight lines on the ceiling to outline the first tile at a 90-degree angle.
4.
Apply a thin layer of a good quality adhesive,
we recommend using Loctite Power Grab, on the edges and crossed section of the tile. We also
suggest applying the
adhesive on the ceiling for better bonding.
Approx. 1.25 lbs of adhesive will cover 15 tiles or 60 sq ft.
5.
Place the first tile into the required position and press firmly but gently. For the remaining tiles, overlap the edges of each previous tile, again
using firm but gentle
pressure. The tiles can be cut with scissors to achieve a desired size.
Surface Types and Methods of Installation
Sheetrock, Drywall, Plaster, Cement
Install ceiling tiles directly to ceiling using an approved adhesive. Verify on the adhesive of your choice whether it will work for both the ceiling tile material
and the material
to which it is to be adhered.
Wood Paneling, Plywood
Install ceiling tiles directly to ceiling using adhesive.
Wood Furring Strips
Furring strips can be used to mount the tiles to. This method is a great solution for ceilings that are not quite perfectly flat and would require a lot of work to
fix. Furring strips
can be leveled with shims when installing, giving a nice flat area for the tiles to adhere to.
Popcorn / Stucco / Cottage Cheese Ceilings
Ceiling tiles should never be applied directly to popcorn ceilings. The ceiling tiles need a flat, even surface to be applied to. There are several ways to create an
appropriate surface.
You can remove the ceiling texture, add a new layer of drywall over the existing surface, or install furring strips.
If you decide to remove the existing texture, it would be a really good idea to test the material for asbestos before going to work. The process of removing the
material is messy and time consuming and depending on your local laws, you may need to have a licensed removal contractor do the work.
Please check into it before you start removal.
